



Remember when hair wasn’t just about looking polished? It was about texture. Volume. Attitude. If you’ve been scrolling through Pinterest trying to find that specific it factor from three decades ago, you are in the right place. The comeback is real. Those iconic styles aren’t just dusty relics of the past. They are actively being pulled from the archives and styled into modern looks.
We are talking about the textures that defined a generation. The grit. The shine. The effortless messiness that took hours to perfect but looked like you threw it up in five minutes. Whether you want to recreate the look exactly or tweak it for your current lifestyle, the blueprints are here. Let’s dive into the textures that started it all.
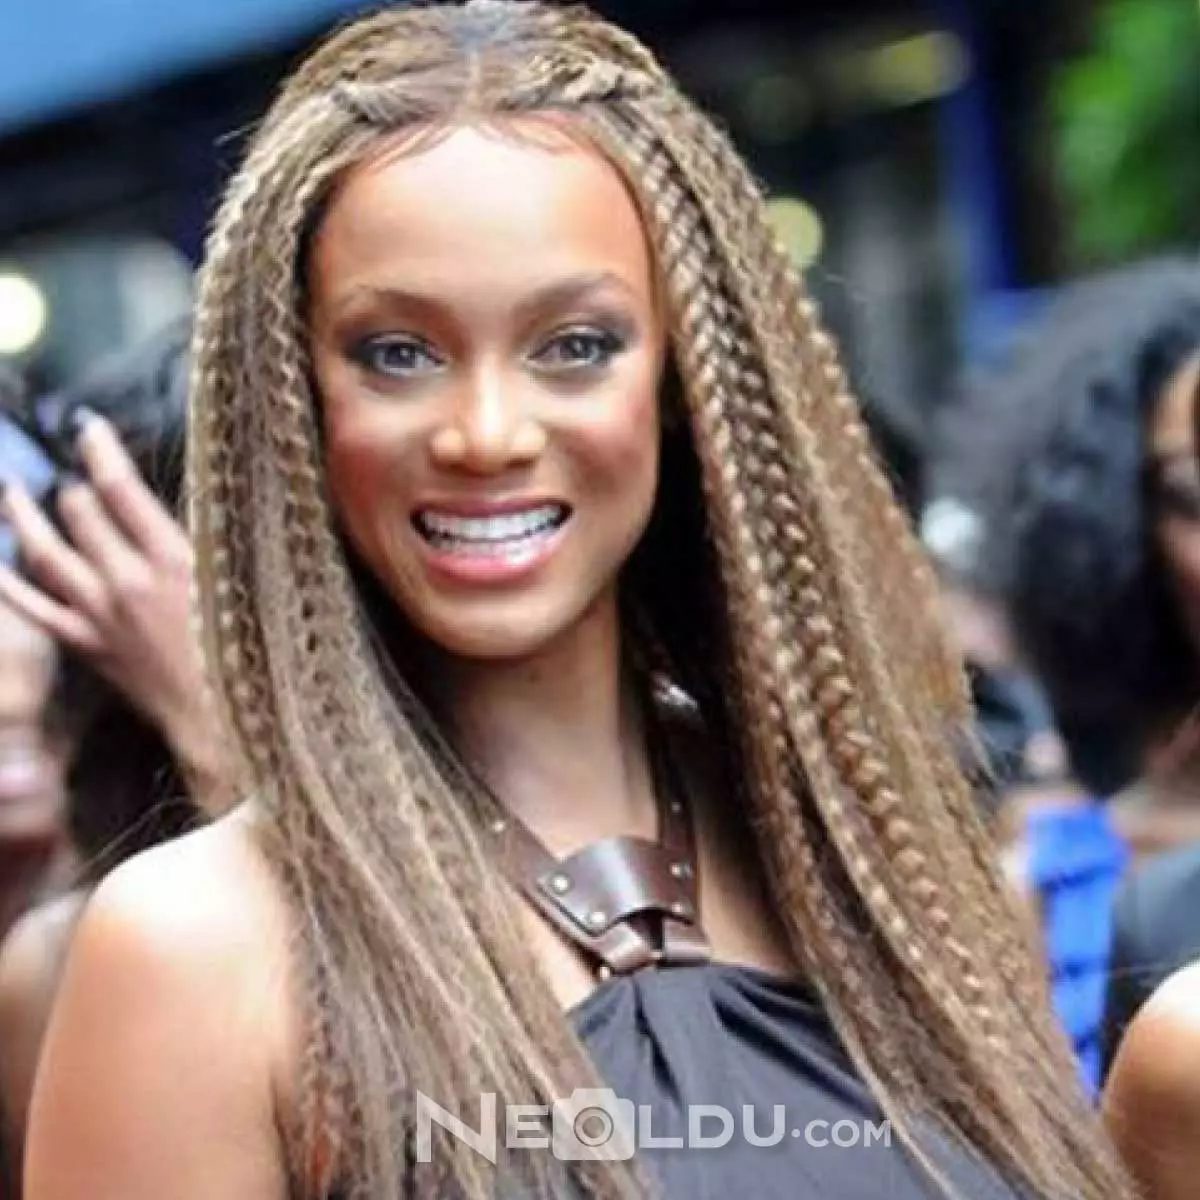
The Ultimate Guide to 90s Teased Hair (Tost Saç)
Let’s start with the foundation. You cannot talk about 90s beauty without addressing the hair that had enough lift to support a choker necklace. The teased back-of-the-head volume, known locally as tost saç, was the non-negotiable standard for almost every celebrity and teenager in the late nineties.
Why is this making a comeback? Because we are tired of flat, airbrushed perfection. We want roots with substance.
Here is how to achieve the 90s teased hair trend without ending up with a helmet full of product:
- Start with clean, dry hair. Product builds up faster on dirty hair, and you want that grit for hold.
- Backcomb strategically. Use a fine-tooth comb to lift sections at the crown. Do not hack at the mid-lengths. Focus on the roots where the volume matters most.
- Layer it. One layer looks sparse. Two or three layers create that dense, cloud-like silhouette.
- Smooth the top. Gently comb over the top layer to hide the teasing. The structure should be invisible, but the height must remain.
- Lock it in. Use a strong-hold hairspray. Not because you are afraid it will fall, but because you want the style to last through dinner.
“The goal isn’t to look like you tried hard. The goal is to look like gravity gave up on you.”
This look pairs perfectly with heavy eyeliner and dark lipstick. It creates a frame for the face that is bold and unapologetic. But don’t worry if your hair is fine or straight. The key is the technique, not the natural texture. You can create this volume on any hair type if you respect the structure.
Is it high maintenance? Yes. Will you spend ten minutes on it every morning? Absolutely. But when you walk into a room with that kind of presence, it’s worth the extra effort.
The 90s were about excess in the best possible way. And nothing says excess like hair you could lose a contact lens in.
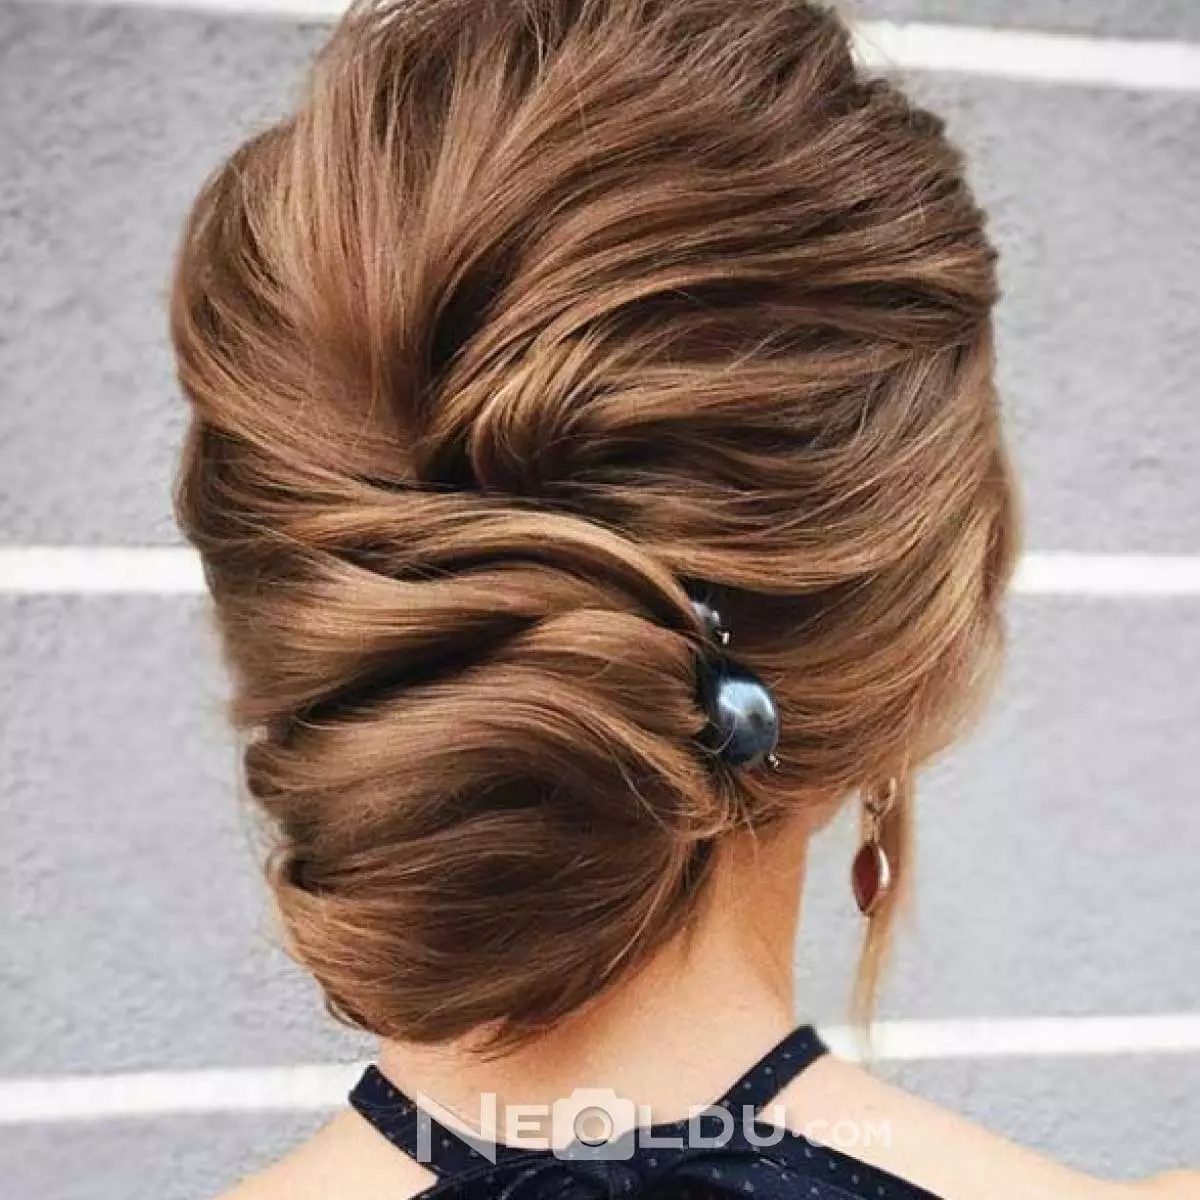
2. Burgulu Topuz Saç Modeli
If you grew up watching Beverly Hills 90210 or simply find yourself doom-scrolling through Y2HR aesthetics, the curled bun is non-negotiable. It is the ultimate nod to that era—effortless but calculated, messy but precise. Think of it as the hair equivalent of a well-worn denim jacket. It brings the 90s into the present without trying too hard.
This style is not just for nostalgia seekers. It works for anyone who wants a look that says “I have my life together” while actually being done in under five minutes. The key is volume. You need that lifted root energy that defined the decade.
Before you twist your hair up, prep matters. Use a texturizing spray at the roots. It gives you that gritty, lived-in look that smooth products kill. If your hair is too clean and slippery, the curls will slip out by lunch.
Here is how to get the structure right:
- Create a high ponytail. Not too tight. You want strands to escape around the hairline for that face-framing effect.
- Split the ponytail. Divide it in half horizontally. This creates the illusion of a thicker bun.
- Twist and wrap. Take each half and twist it around the base. The direction doesn’t matter much, but keep it consistent for symmetry.
- Secure and tease. Pin it in place. Then, take a comb and gently backcomb the bun itself. This adds the necessary chaos and volume.
“The 90s weren’t about perfection. They were about attitude. The bun should look like it fell there, not like you spent an hour sculpting it.”
Why does this still work? Because it bridges the gap between formal and casual. You can wear it to a board meeting or a brunch. It is versatile in a way that straight hair rarely is. Plus, it saves your scalp from heat damage since you are keeping the ends tucked away.
Pair it with a slip knot headband for maximum authenticity. Or skip it for a minimalist vibe. The choice is yours. But don’t skip the volume. That is the mistake most people make. They go for a flat, sleek bun. That is 2020s minimalism. The 90s bun needed height. It needed presence.
Give your hair some texture before you start. Use a dry shampoo if you have to. The grit helps the pins hold. And when you are done, don’t brush it out. Let the individual curls define the shape. It is supposed to look a bit undone. That is the point.
90’lar geri döndü. Ve bu kez, o ikonik, düz ve parlak saçlardan ziyade daha çok doku ve hareket arayanlar için geliyor. Burgulu topuz saç modeli, o dönemin en belirgin estetik tercihlerinden biri olarak karşımıza çıkıyor. Sadece bir geçici trend değil, aslında hayatımıza geri dönen bir klasik.
Neden bu kadar popüler? Çünkü hem pratik hem de oldukça dramatik. Saçınızı iki veya üç farklı bölgeden ayırmanız yeterli. Rastgele bir topuz oluşturmak, o “tam olarak uğraşmadım ama harikayım” havasını veriyor. Vintage sevenler için bu, 90’ların ruhunu yakalamanın en hızlı yolu.
Pratik Uygulama Adımları
Modeli uygularken takip etmeniz gereken basit bir süreç var. İlk adım her zaman düzleştirme. Saçlar düz ve pürüzsüz olmalı. Ardından, saçınızı istediğiniz kadar bölüme ayırın.
Her tutamı özenle burun.
Sonra bunları birleştirerek topuz haline getirin.
Sonuç, zamana meydan okuyan bir görünüm.
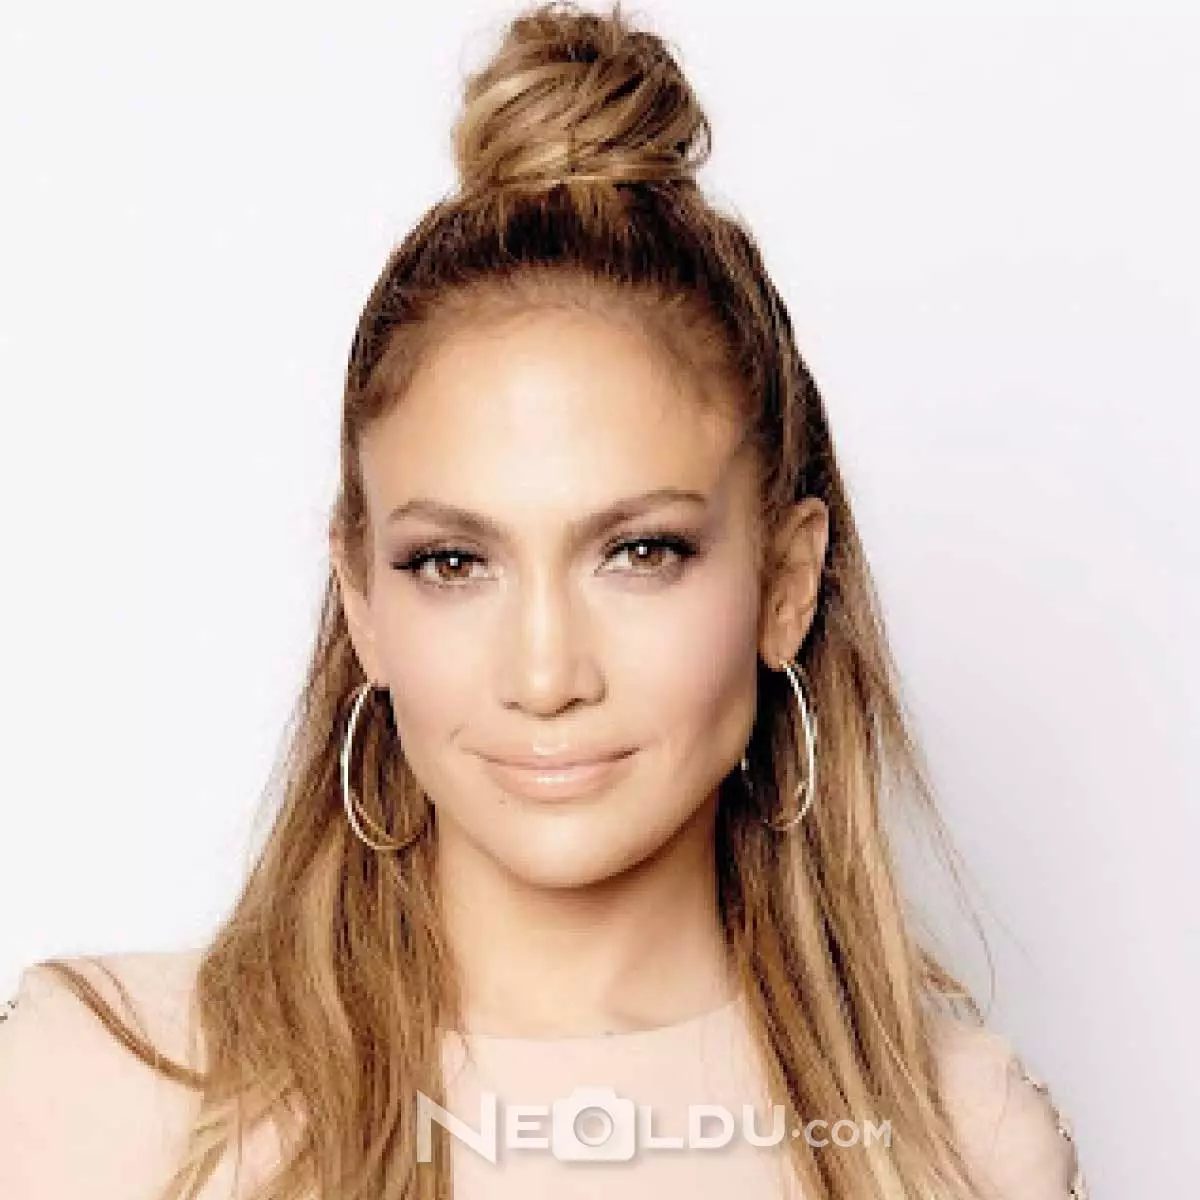
Yarım Topuz Saç Modeli
Daha az dramatik, daha çok günlük hayat için uygun olan ikinci alternatif ise yarım topuz saç modeli. Bu stil, uzun saçlara sahip kadınlar için harika bir denge sağlar. Üst kısmı toplayarak hem düzgün bir görünüm hem de özgürlük hissi yaratırsınız.
90’ların bu iki temel formülü, modern günümüzde de büyük ilgi görüyor. Hangisi sizin tarzınıza daha uygun? Deneysel olan mı, yoksa daha yarı-open mı?
It’s not just a phase. The half-up, half-down bun is back. And it’s not sitting quietly in the corners of your hair history book.
Remember the nineties? Before we had the endless scroll of micro-trends, hair was simpler. Messier. Real. The half bun wasn’t just a style. It was a survival tool. You had bad hair days. You had flat roots. You had that one awkward week where your bangs refused to cooperate. The half bun fixed it all. It covered the sins. It hid the mistakes. It looked intentional.
Today, it’s not just for bad hair days.
Celebrities wear it to red carpet after-parties. Influencers wear it to grocery stores. It’s everywhere. Why? Because it works.
How the Half Bun Solves Modern Hair Problems
You don’t need a stylist for this. You don’t need heat tools. You need two hands and five minutes.
Start with hair that’s not freshly washed. Day-two hair holds better. Day-three is even better. The natural oils add grip. Without that, the bun slips. It slides right off. You want texture. You want friction.
Pull the top section back. Not too tight. If you pull too tight, you get tension headaches. You get a pulled-back look that feels like a helmet. Leave some strands loose. Let them frame your face. Those loose strands are the difference between “I tried” and “I did.”
Twist. Pin. Secure.
Use a spiral hair tie. It holds better than elastic. It doesn’t crease the hair. It keeps the shape without the damage. Then, gently tug at the bun. Pull it apart. Make it look bigger. Fuller. Messier.
“The half bun works because it balances control with chaos. It’s structured enough to look put together, but loose enough to look like you just threw it on before heading out the door.”
Why It Works for Every Face Shape
This style is forgiving. That’s its superpower.
If you have a round face, the height at the crown elongates your features. It draws the eye upward. If you have a square jawline, the loose strands soften the angles. Break up the harsh lines.
It doesn’t matter if your hair is straight. Curly. Thick. Thin.
Thick hair? Use more pins. Secure the base. Prevent slip.
Thin hair? Tease the crown slightly before tying it up. Add volume at the roots. It creates the illusion of density.
Where to Wear It (And Where to Avoid It)
This is not a black-tie event bun. Save the sleek chignon for the gala.
This is a daytime bun. A coffee-run bun. A “I have a Zoom call in ten minutes and I can’t figure out my eyebrows” bun.
It pairs well with oversized sweaters. Denim jackets. Slip dresses. It’s versatile because it’s understated. It doesn’t compete with your outfit. It supports it.
Avoid it if you have a major event where you’ll be dancing for hours. The pins can come loose. The bun can unravel. If you’re moving a lot, opt for a full bun
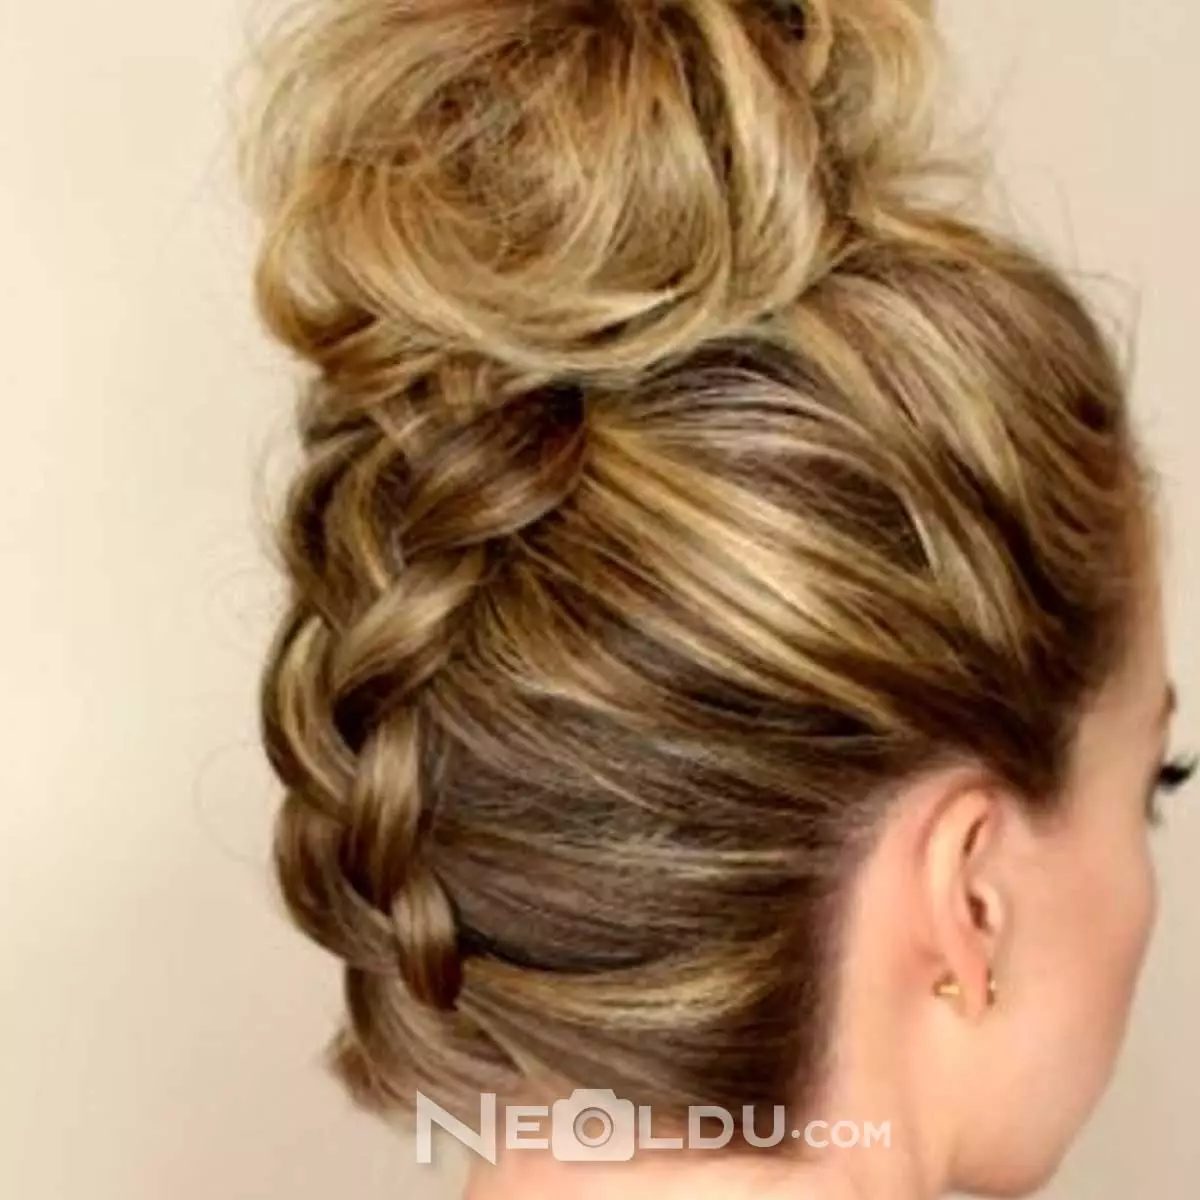
If you grew up in the 90s, you remember the chaos. Not the good kind. The kind where you’d tie a scarf around your hair to get that signature look. That era wasn’t about precision. It was about volume. Specifically, big scrunchies holding together a messy bun. It was unavoidable. You couldn’t escape it in school photos or music videos.
The process was simple, almost lazy in its execution. You pulled the hair up. Not tight. Just up. Then let it fall into a loose, disheveled knot. It didn’t matter if strands escaped. They were supposed to. The whole point was the “I just threw this together” vibe.
It survived.
Decades later, the messy bun isn’t just a throwback. It’s a staple. Women still flock to it. Why? Because it works. It’s comfortable. It keeps hair off your neck when the humidity spikes. It hides a bad hair day without looking like you’re trying too hard. Modern styling takes it further. A drop of natural oil. Just enough to tame frizz but keep that lived-in texture. The result? Volume. Shine. Life.
5. High Ponytail Hairstyle
The messy bun had its moment. But the high ponytail? That’s the power move.
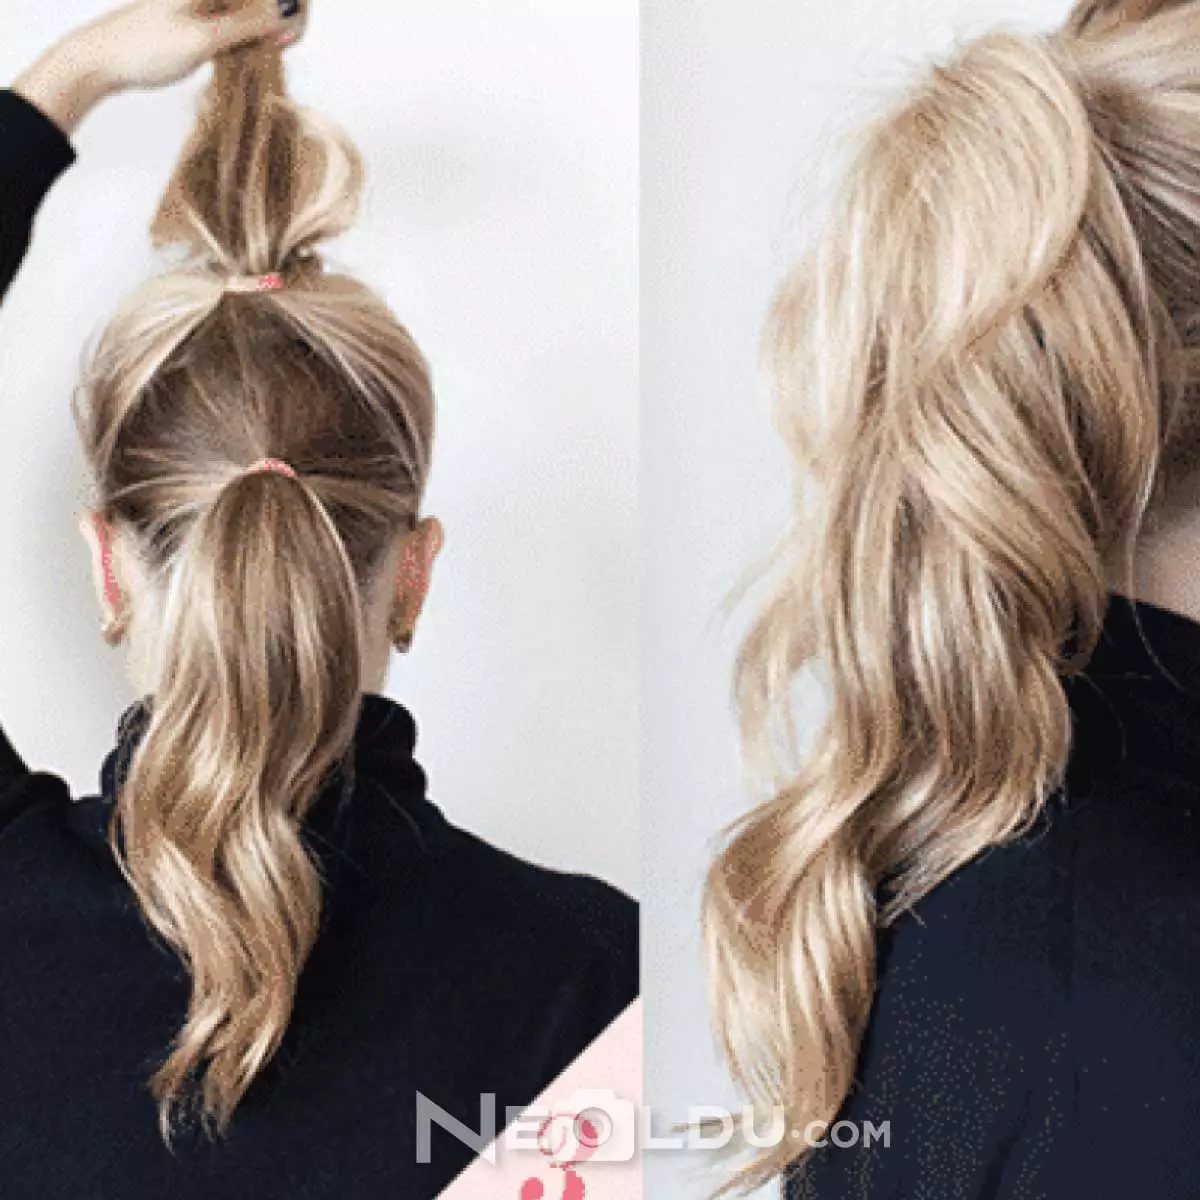
It’s cleaner. Sharper. It lifts the face visually. Think of the structure. Everything is pulled back. The tension creates a sleekness that contrasts with the chaos of the bun. It’s not about hiding the hair. It’s about showcasing the line of the neck. The jawline.
There’s a specific geometry here. The elastic sits high on the crown. Not the nape. The crown. This elevation changes the entire silhouette of the head. It looks energetic. Alert.
Style it sleek for a corporate meeting. Add a claw clip for a casual brunch. The versatility is the real trend here. It’s not just one look. It’s a framework. You build on it.
The 90s gave us the messy bun. The high ponytail gives us control. Both are essential. But one demands a different kind of confidence. Less “I can’t be bothered.” More “I know exactly what I’m doing.”
6. Ultra Kıvırcık Saç Modeli
It’s not just about volume anymore. It’s about texture. And right now, that texture is wild.
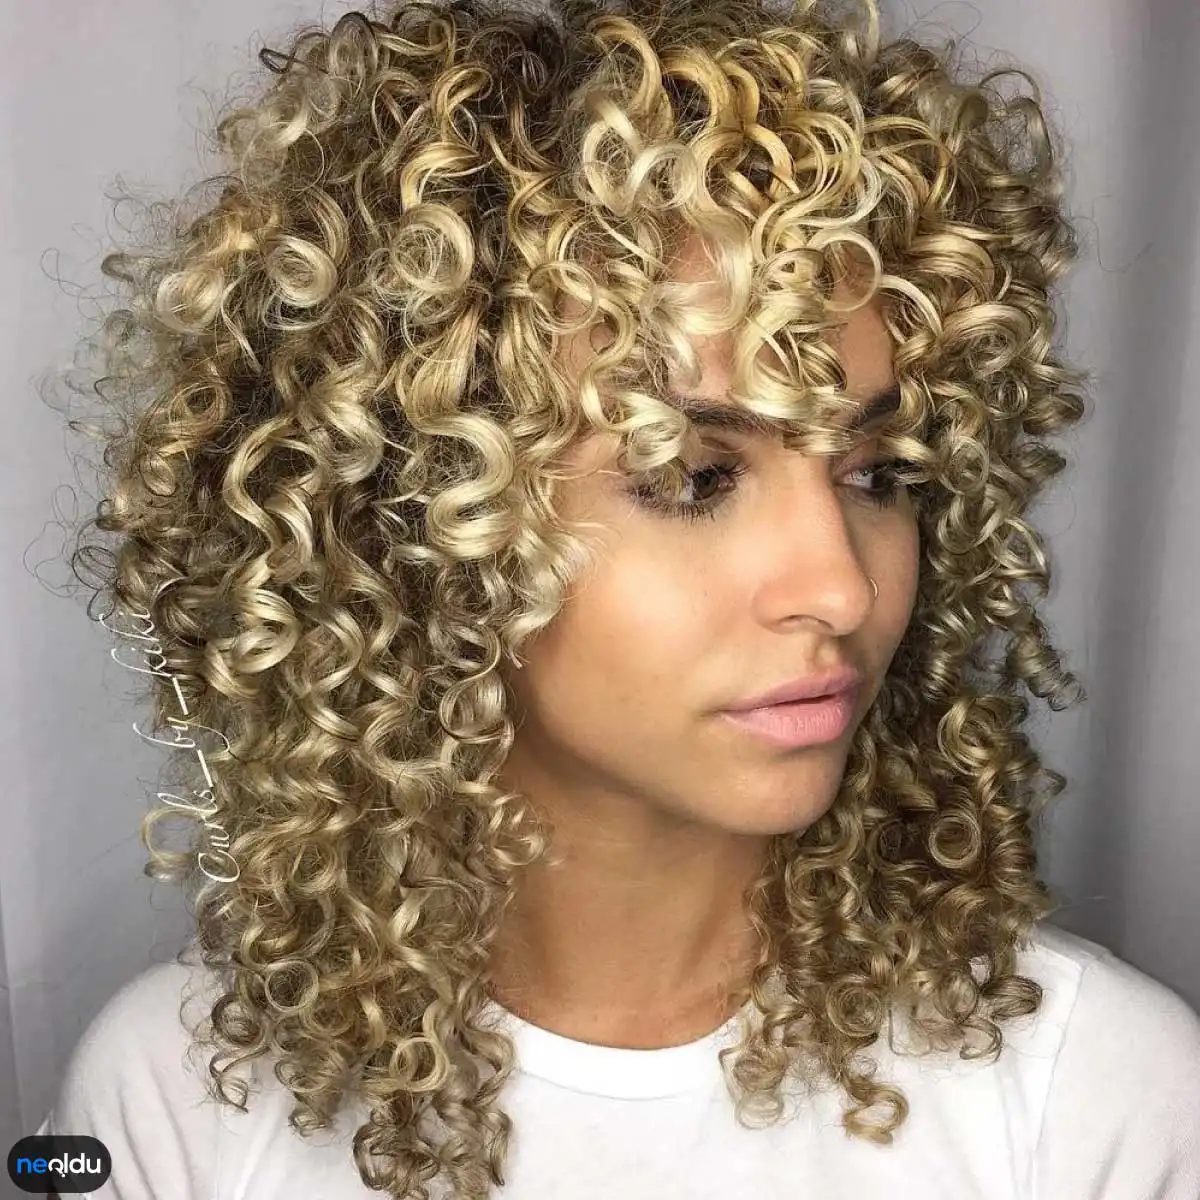
High ponytails ruled the nineties. They are still there, sharp and sleek. But if you are looking for what defines the current aesthetic, look at the curls. We are talking about defined, bouncy, ultra-curly hair.
This look has shifted from a struggle to a statement. For years, many women fought against their natural curl pattern. We smoothed it out. We burned it flat. We tried to force it into a straight line.
That era is fading.
Today, the goal is enhancement, not elimination. The “ultra curly” style celebrates the tightest coil in your hair. It is not messy. It is intentional. It takes time to define, yes. But the payoff is a head of hair that moves with you, rather than against you.
Why This Trend Matters Now
People ask how this differs from just having curly hair. The difference lies in the definition.
Standard curly hair might be frizzy or undefined. Ultra curly means every ringlet has a partner. It is structured. It looks expensive. It looks like you spent twenty minutes in front of the mirror, even if you didn’t.
“The shift isn’t just about style. It’s about efficiency. You stop fighting your hair and start using its natural architecture.”
How to Achieve the Look Without the Frizz
You don’t need expensive products to get this shape. You need technique. And patience.
- Start with wet hair. Dry brushing destroys the pattern. It creates a halo of static. Never.
- Use the right hold. A strong-hold gel or mousse is non-negotiable here. Light serums won’t cut it. You need something that locks the curl in place while it dries.
- Plopping or diffusing. Air drying can lead to uneven results. A diffuser attachment on your hairdryer helps maintain the shape. Plopping (wrapping hair in a microfiber towel) reduces frizz at the root.
- Don’t touch it. While it dries, your hands are the enemy. Touching breaks the cast and creates flyaways. Let it finish drying completely before you shake it out.
Who It Works For
This style is inclusive. It works for tight coils and loose waves. The key is adapting the product load.
- Fine curls need lighter products to avoid weighing down the strand.
- Thick, dense curls require heavier creams to control humidity and maintain definition.
The beauty of this model is that it highlights facial features without hiding them. Unlike a heavy fringe or a straight bob that frames the face rigidly, ultra curls soften the jawline. They draw attention to the eyes. They add height.
The Maintenance Reality
Let’s be honest. It is not zero-maintenance.
You will need to refresh your curls daily or every other day. Water is your best friend here. A spray bottle with a tiny bit of leave-in conditioner can revive dead curls.
Sleeping on cotton pillowcases is a trap. The friction ruins the definition overnight. Switch to silk or satin. It sounds like a luxury expense, but
7. İkiz At Kuyruğu Saç Modeli
Kıvırcık saçın en büyük kozu hacimdir. Ve bu model, o hacmi en üst düzeye çıkarır. Saçlar olabildiğince kabartılır. Dağınık, doğal bir hava yayılır. Bu dağınıklık, kasıtlıdır. İlgi çekici bir sonuç doğururken, saçlara o aranılan dolgunluğu katar. Akışına bırakılmış kıvırcıklar, katlı kesimlerle harmanlanır. Sonuç? Gösterişli, modern bir form.
İkiz at kuyrukları artık çocukluğa ait değil. Onlar bir statement. Özellikle kıvırcık saçlarda, bu stil daha da güçlü durur. Saçların doğal dalga yapısı, kuyrukların etrafında ekstra bir hareket yaratır. Dağınık görünüm, özensizlik değil, bilinçli bir seçimdir. Katlı kesim, saçların ağırlığını azaltır. Bu sayede kıvrımlar daha belirgin hale gelir.
Neden bu kadar popüler? Çünkü bakım gerektirmez. Saçınızı yıkayın. Kurutun. İki kuyruk yapın. Bitirildi. Modern kadınlar için pratiklik her şeydir. Aynı zamanda şık. Ofise, çıkışa, ya da sadece kendinizi iyi hissetmek için.
Nasıl Yapılır?
İki kuyruk, simetri arayanlar için idealdir. Ama mükemmeliyetçilik baskın değilse, daha iyi sonuçlar elde edersiniz. Saçları iki eşit parçaya bölmek yerine, doğal bir bölüşüm yapın. Bu, dağınık görünümü destekler.
Kıvırcık saçlar için en önemli ipucu: nemli veya tam kuru. Tam kuru saçlar daha fazla kabarma yapar. Bu da o istenen hacmi verir. Nemli saçlar daha kontrollü, ama daha az hacimli. Tercih size kalmış.
Kimler İçin Uygun?
Tüm kıvırcık saç tipleri. Ama özellikle 3A ve 3B derecesindeki kıvrımlar için harika çalışır. Saçları inceyse, katlı kesim mutlaka olmalı. Aksi halde saçlar düzleşip ağırlaşabilir. Kalın saçlar için ise, bu model bir nimet. Hacim zaten var. Sadece şekillendirmek kalıyor.
Bakım İpuçları
Kıvırcık saçlar kuruluk çeker. Bu modeli yaparken, saçınıza hafif bir serum sürün. Sadece uçlara. Diplerde yağlanmaya neden olmaz. Bu, dağınık görünümü korurken, saçları sağlıklı tutar. Sabahları saçları tekrar şekillendirmek için ıslak ellerinizi kullanın. Su, kıvrımları yeniden canlandırır.
Stil Önerileri
İkiz at kuyrukları, yüz şeklinize göre değişir. Yuvarlak yüzler için

Saçlarını iki eşit parçaya bölüp sağ ve sol üst kısımları topladığında, işin içinden çıkılmaz gibi görünüyorsa acele etme. İkiz at kuyruğu saç modeli tam da budur. Hafif dağınık ama bilinçli bir duruş sergiler. Hareketli bir görünüm elde etmenin en hızlı yolu budur.
Gençlerin favorisi olması tesadüf değil. Neden mi? Çünkü hem rahat hem de dikkat çekici. “Bu stil beni çok küçük gösterir mi?” diye endişelenme. Tam tersine, yüz hatlarını çerçeveleyen iki kuyruk, sana muazzam bir hava katar. Spor bir kıyafetinle kombinleyebilirsin. Ya da tam tersi; etek giyip bu saçla şık durabilirsin. Esneklik burada anahtar kelime.
8. Bandanalı Saç Modeli
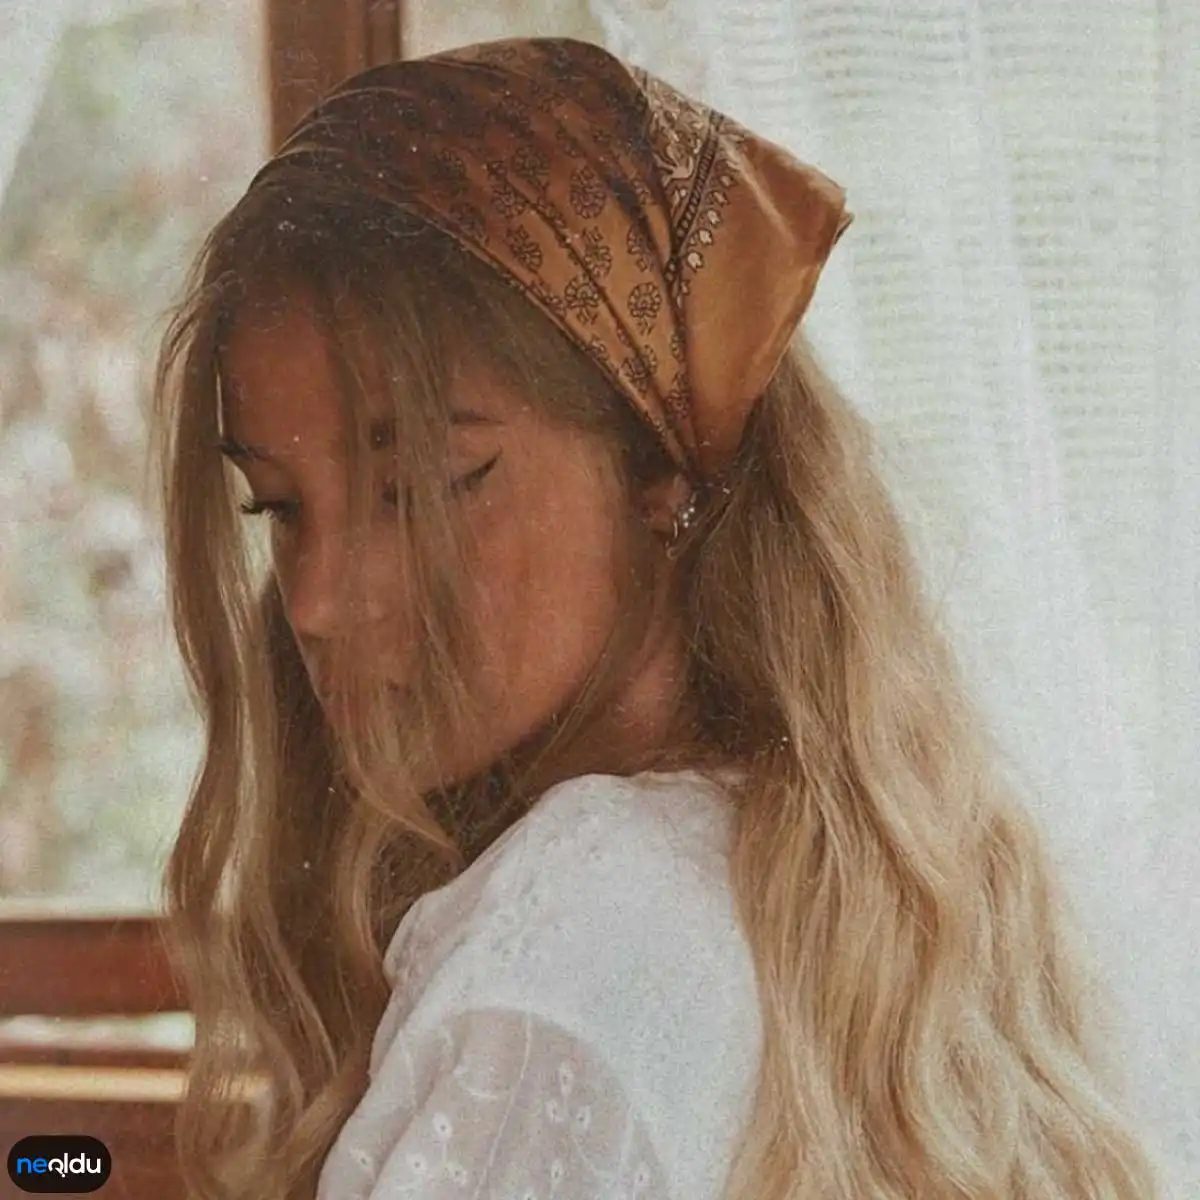
Bandana takmak o kadar basit ki neredeyse bir eylemden ibaret. Saçınızı toplayıp enseninizde bağlayın ya da direkt olarak kafanıza oturtun. Sadece bu kadar. 90’larda bu o kadar popülerdi ki, bugün hala o nostaljik havayı yakalamak isteyenler için birincil seçenek olmaya devam ediyor.
Sadece bir aksesuardan ibaret değil. Saçlarınızı sıcak havalardan koruyor. Güneşin doğrudan kafanıza geçmesini engelliyor. En önem de kıyafetlerinizle uyum sağlıyor. Bir bandana takmak, kendinizi adeta 90’larda gibi hissettiren bir anı yaşatıyor size. Nostalji kokuyor. Retro bir hava yayıyor. Bu küçük detay, tüm görünümünüzü dönüştürebilir.
9. Dışa Fön Saç Modeli
10. Kelebek Tokalı Topuz Saç Modeli
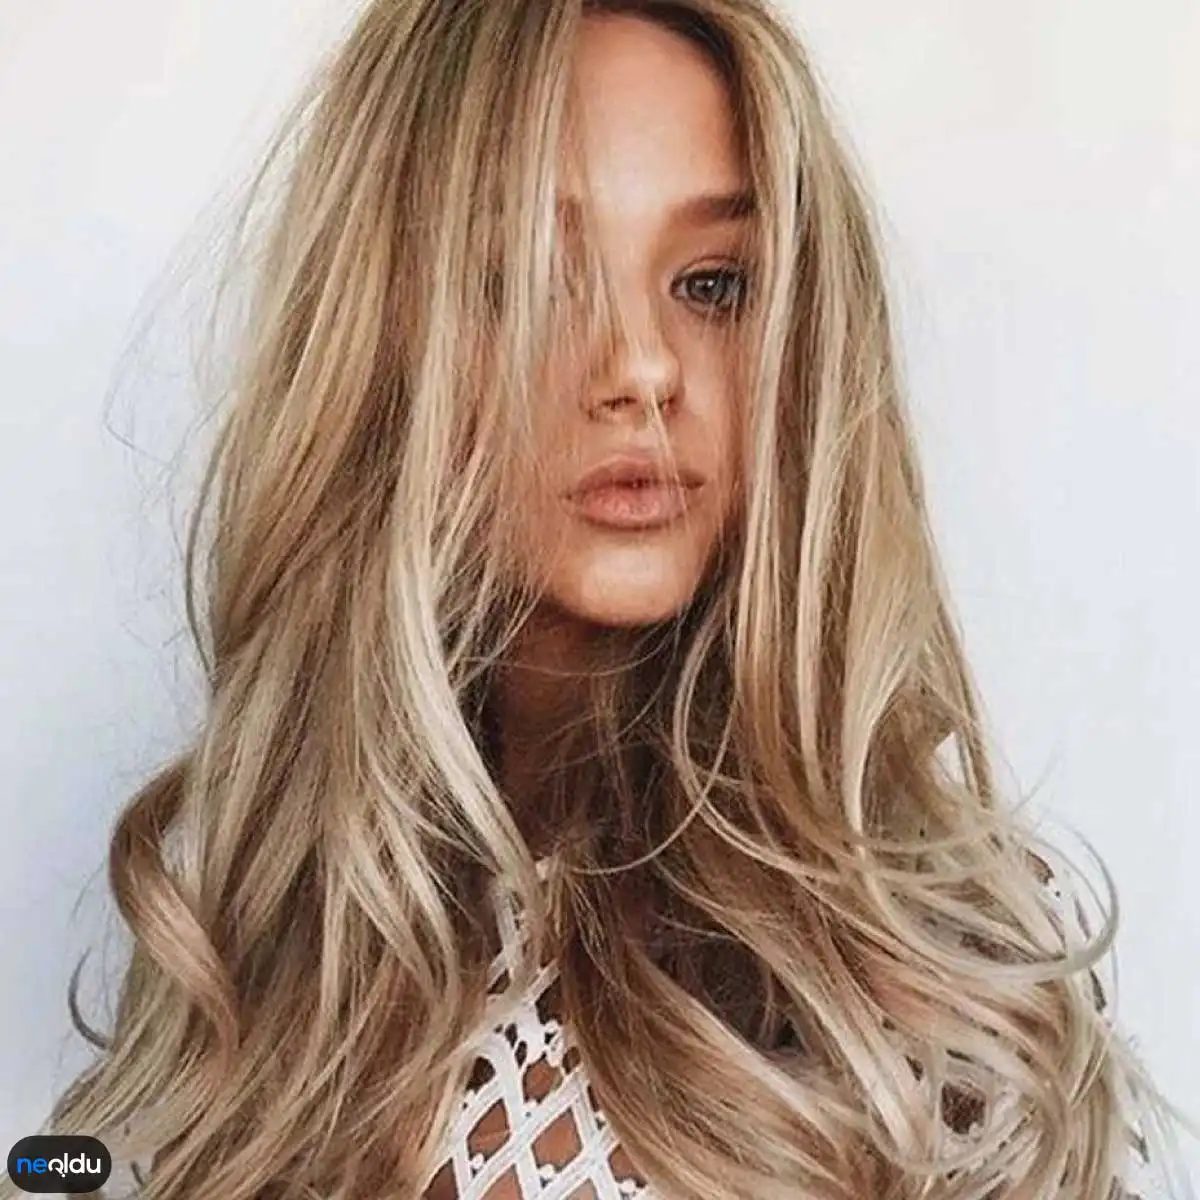
Dışa doğru kıvrılan saçlar 90’ların ikonik silüetini yeniden hayatımıza soktu. Hailey Baldwin’dan Bella Hadid’e uzanan bu dalgınlık, sadece nostaljik değil; pratik ve modern bir duruş sergiliyor. Özellikle yaz aylarında bu stilin popülaritesi daha da artıyor. Neden mi? Saçlara ekstra hacim kazandırırken, yüz çevresindeki o doğal parlaklığı ve canlılığı koruyor.
Ve şimdi, bu trendin en tatlı yorumuyla karşılaşıyoruz.
Neden Kelebek Detaylı Topuzlar Trend?
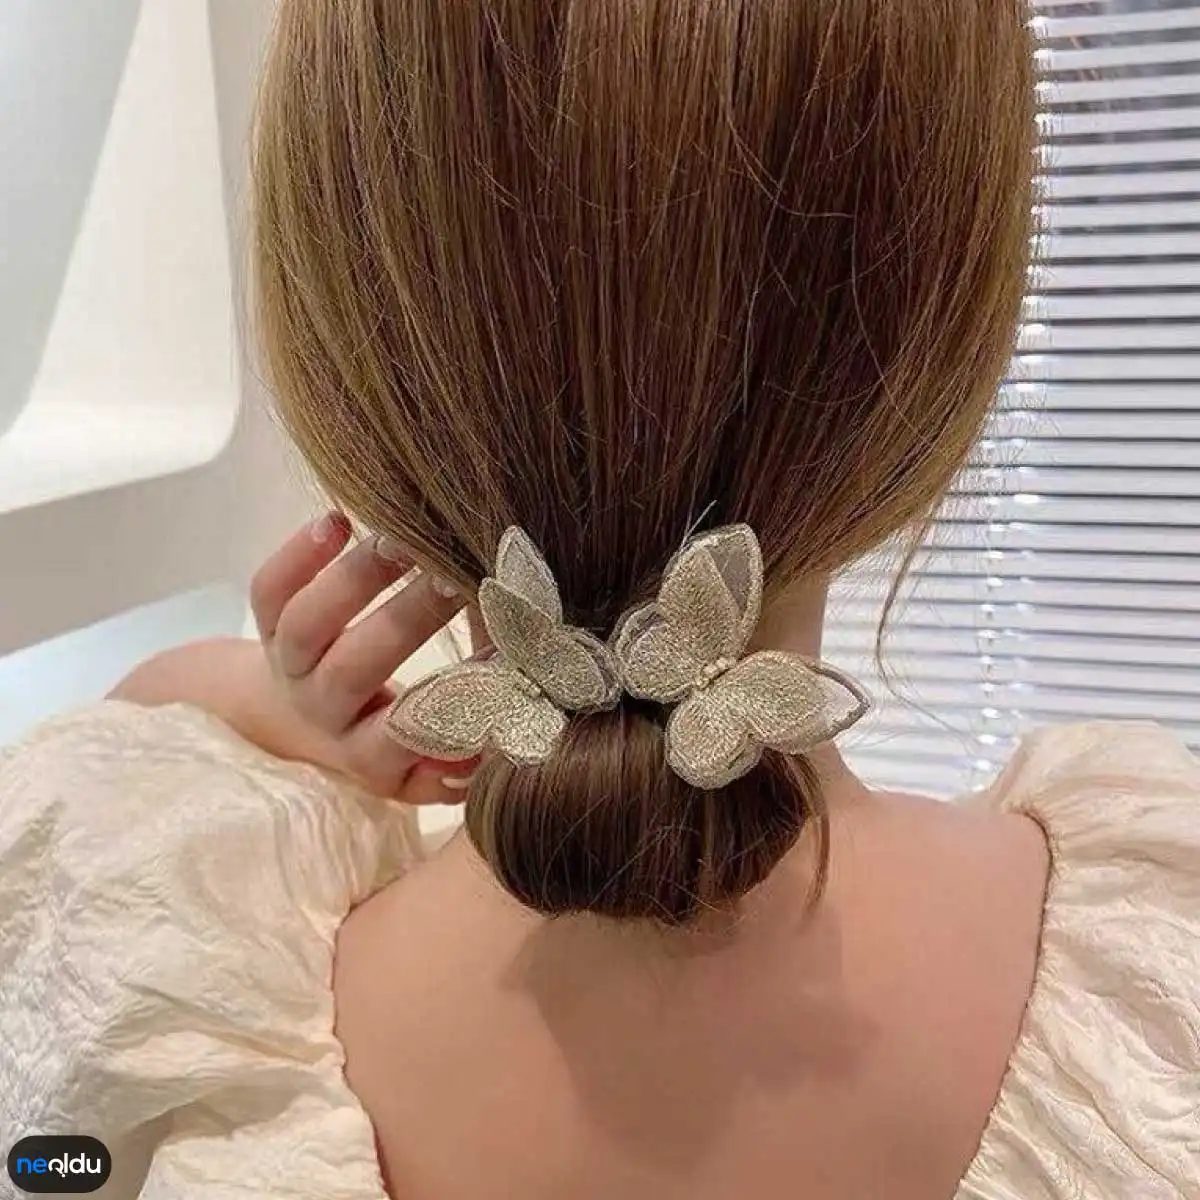
Basit bir topuz sıkıcı gelebilir. Aşırıya kaçarsa, “sabah acelesi” havası verir. İşte tam bu noktada aksesuar devreye giriyor. Özellikle kelebek tokalar, düz ve sıkı toplanmış saçlara anında bir femininlik ve hafiflik katıyor. Sadece bir süs değil; stilin tamamlayıcısı.
Bu model, saçlarını her gün farklı tutmak isteyenler için ideal. Hem rahat hem de göz alıcı. Üstelik, saçın tam olarak nasıl toplandığından bağımsız olarak, kelebek detayları görsel odak noktası oluyor. Yani saçın düzensiz olması da sorun değil. Aksine, o hafif dağınıklık, kelebekle birleşince daha doğal ve çekici duruyor.
Nasıl Yapılır?
Önce saçınızı hafif ıslak veya kuru hale getirin. Tam ortadan veya yanlardan toplayarak bir topuz yapın. Sıkı çekmeyin. Birkaç tutamı yüzünüze doğru bırakmak, yumuşak bir görünüm sağlar. Sonra, topuzun tabanına veya yanlarına kelebek tokayı sabitleyin.
- Hacim için: Topuzdan önce saç diplerini hafifçe kökten yukarı doğru tarayarak hacim oluşturun.
- Aksesuar seçimi: Metalik kelebekler daha modern, kumaş olanlar daha romantik bir hava verir.
- Tutarlılık: Topuz ne kadar düzensiz olursa, kelebek o kadar belirgin ve şık durur.
Kimlere Uygun?
Kısa saçlardan uzun saçlara kadar her saç tipiyle uyum sağlar. Yüz şeklinize göre kelebeğin konumunu değiştirebilirsiniz. Uzun oval yüzlerde, topuzun üstüne konulan kelebek, yüzü dengelerken; yuvarlak yüzlerde, yanlara konulan detaylar daha ince bir görünüm sağlayabilir.
Sezonun en çok tercih edilen saç modellerinden biri olan dışa fön saçları ve kelebekli topuzlar, birebir kombinlenerek de kullanılabilir. Yani, dışa kıvrılan saçlarınız varsa, bunları arka tarafa toplayıp kelebekle sabitlemek, hem trendi yakalamak hem de pratik bir çözüm sunmak anlamına gelir.
Bu küçük detay, büyük bir fark yaratır.
The Butterfly Bun Returns: Why It’s Your Summer Savior
It’s not just a fleeting trend. The butterfly bun—once the defining hairstyle of the ’80s and ’90s—is back. And this summer, it’s everywhere.
Why does it matter? Because it’s effortless. And it’s practical.
The look is inherently chic. It adds a softness to your face. A naivety that feels fresh, not dated. But the real win isn’t just how it looks. It’s what it does for your comfort.
Why This Hairstyle Wins in High Heat
Let’s be honest. Summer hair is a struggle. Heat. Humidity. Sweat sticking to your neck. It’s miserable.
This style solves that. By pulling everything up, you let your nape breathe. Air circulates. You stop sweating in places you never thought about. It’s a simple mechanic. High impact.
How to Get the Look (Fast)
You don’t need an hour. You don’t need a team of stylists.
This hairstyle can be done in seconds. Literally.
- Gather your hair high.
- Twist it loosely.
- Pin it securely.
- Add a claw clip or scrunchie for that signature “butterfly” volume.
That’s it. The volume at the base creates the shape. It holds. It stays put.
Which Accessories Work Best?
Not all clips are created equal.
For that authentic retro vibe, lean toward oversized claw clips. They hold more hair. They distribute the weight better. If you want the delicate touch, use thin ribbon ties. They add texture. They break up the monotony of a tight bun.
Is It Worth the Effort?
Some might call it basic. But basic doesn’t mean boring. It means accessible.
The butterfly bun is inclusive. It works on thin hair. It works on thick hair. It works when you’re running late to work. It works when you’re trying to cool down after a workout.
It’s not about perfection. It’s about ease.
So why fight the heat? Pull it up. Let it breathe. Look back at the nineties with a smile.
The Home Hair Game is Real (And Easier Than You Think)
You don’t need a salon chair to get a cut that doesn’t make you want to hide under a blanket for a week. The myth of the “home haircut” is mostly just fear talking. Fear of scissors slipping. Fear of looking like a hedgehog. But here’s the truth: most DIY styles aren’t about precision. They’re about texture, volume, and owning the imperfection.
When you cut your own hair, you stop chasing perfection and start chasing personality. It’s messy. It’s real. And honestly? It’s often more stylish than the over-styled, cookie-cutter looks you see on the runway.
Why Home Cuts Work for Modern Women
The shift toward DIY beauty isn’t just about saving money, though that’s a nice bonus. It’s about agency. It’s about understanding your hair’s natural behavior instead of forcing it into a mold.
- Control over length. You decide exactly how much to take off. No misunderstanding with a stylist who thinks “trim” means “bob.”
- Learning your texture. You notice where your curls kink or where your straight hair lies flat. That knowledge is power.
- Frequency. You can touch up the ends every two weeks without booking an appointment.
Scissors Are Not Kitchen Shears (A Critical Warning)
Before you pick up any blade, listen up. Using kitchen scissors is the fastest way to fray your ends and create a split-end minefield that will take months to grow out.
Invest in a cheap pair of hair-cutting scissors. You don’t need $200 professional shears. $10 from a craft store works. The blades need to be sharp and straight-edged. Dull scissors crush the hair shaft instead of cutting it clean. This isn’t a suggestion. It’s the difference between a neat cut and a frayed mess.
The “Chick Cut” Method for Bangs
Let’s tackle the scary part. The bangs.
- Section it off. Isolate a triangular section at the front. Pin the rest of your hair back.
- Angle down. Tilt your head forward so your bangs fall naturally toward your face.
- Cut vertically. Don’t cut straight across in a straight line. That looks like a shelf. Instead, point your scissors down and snip into the hair vertically. This creates softness and texture.
- Less is more. Cut less than you think you need. You can always take more off. You can’t glue it back on.
“If you’re nervous, cut in small increments. Your hair will grow back. Your confidence might not if you mess up the first time.”
Trimming Split Ends Without a Barber
You don’t need a full haircut to maintain health. You just need to remove the damage.
- The Twist Method. Take a small section of dry hair. Twist it tightly. The split ends will poke out past the rest of the hair. Snip those protruding bits.
- Dry Cutting. Never cut wet hair if you’re doing a DIY trim. Wet hair stretches and shrinks when it dries. Cut it dry to see exactly what you’re working with.
- **Focus on the